Documentation
Trailing Edge Flap Asymmetry Test
ReliablePlane™: TE Flap Asymmetry Test
- Version: ReliablePlane™ 2.20 (b.77)
- Author: SensOS, LLC
- Created: 05 May, 2024
- Updated: 11 Nov, 2024
If you have any questions that are beyond the scope of this document, Please feel free to email via info@sens-os.com
Description
This test allows the Technician to perform the Flap Position Indicator, Flap Position Transmitters, and Flap Skew Sensors dynamic test utilizing the RP-1212 data acquisition unit and ReliablePlane™ software. The test will determine the condition of the electrical sub-components of the Flap Position and Skew Sensor system by recording and comparing the supply and output voltages of the electrical sub-components.
Compatibility
This module is compatible with the following devices:
- SensOS RP-1212
12-Channel / Wireless BLE Data Acquisition Unit
Resolution: ch1-10: 3mV, ch11-12: 7mV
BLE Notifications: up to 5 per second
Test Procedure
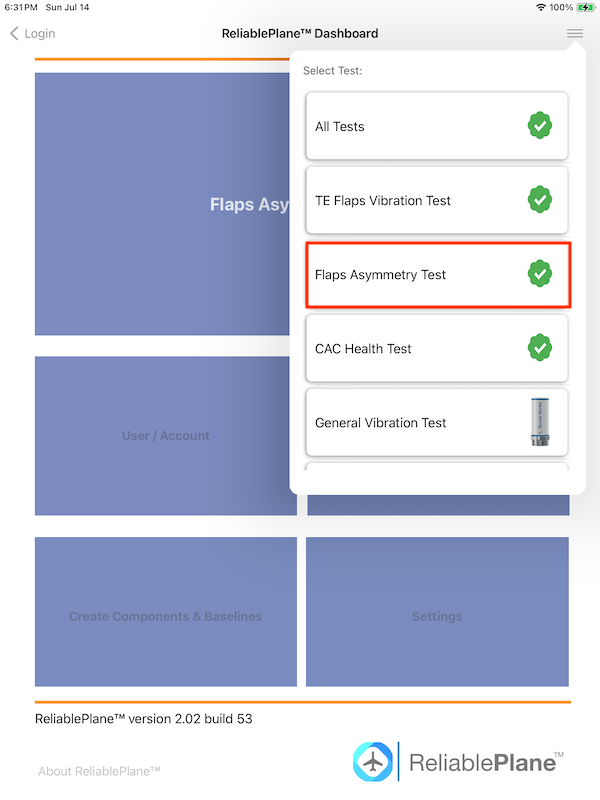
- Open the ReliablePlane™ App and select TE Flap Asymmetry Test from the the type of test from the top menu button.
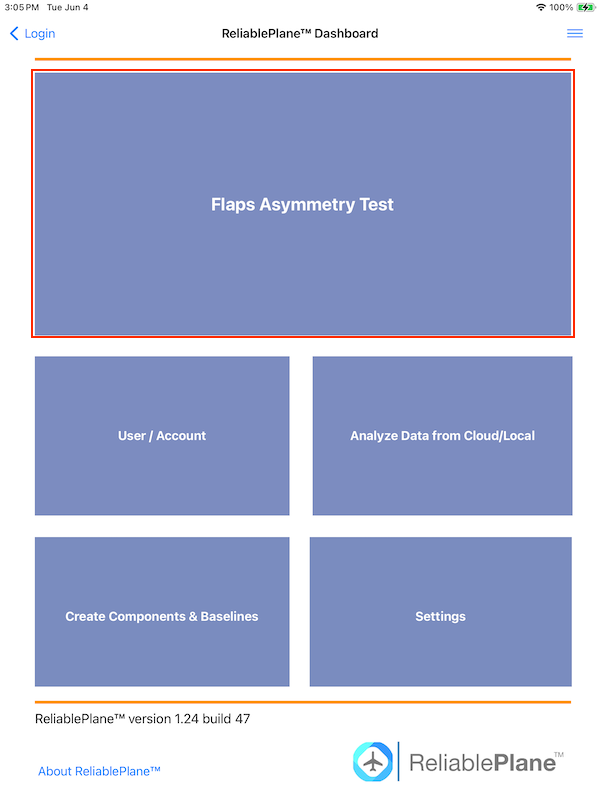
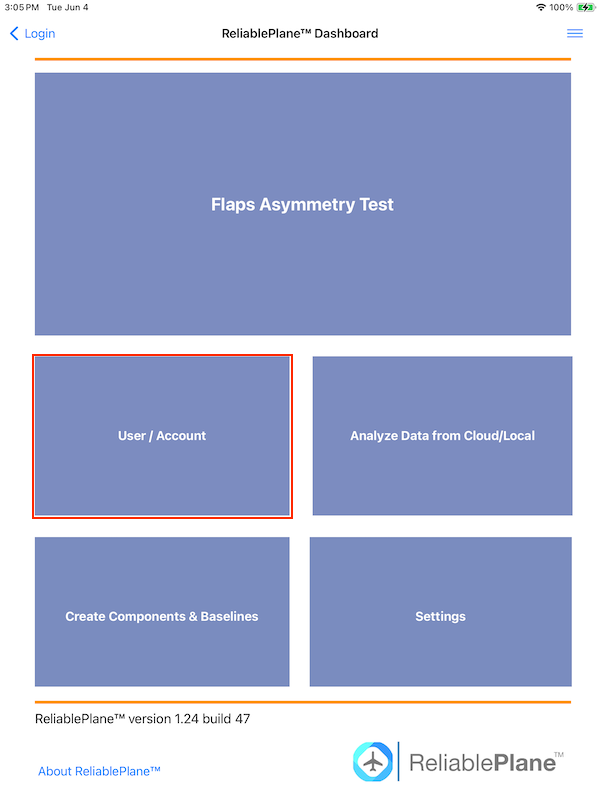
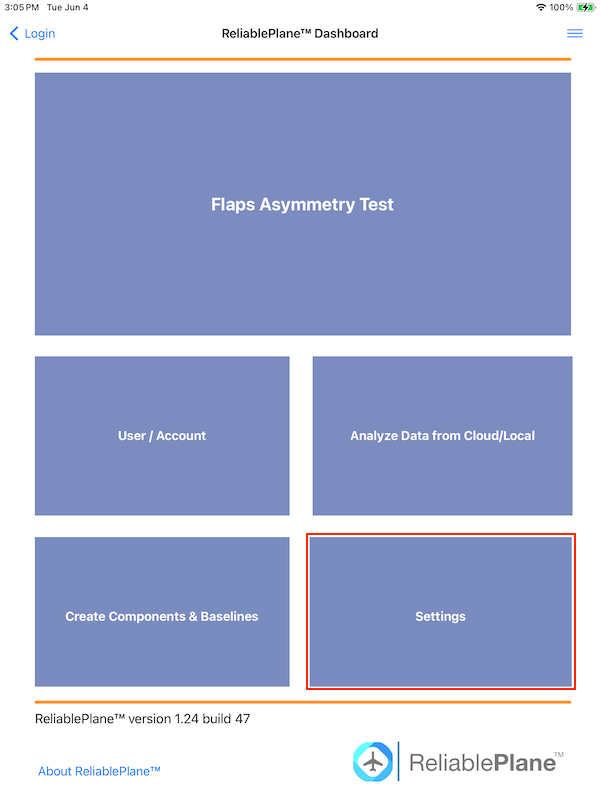
- Press the Flap Asymmetry Test button from the main dashboard
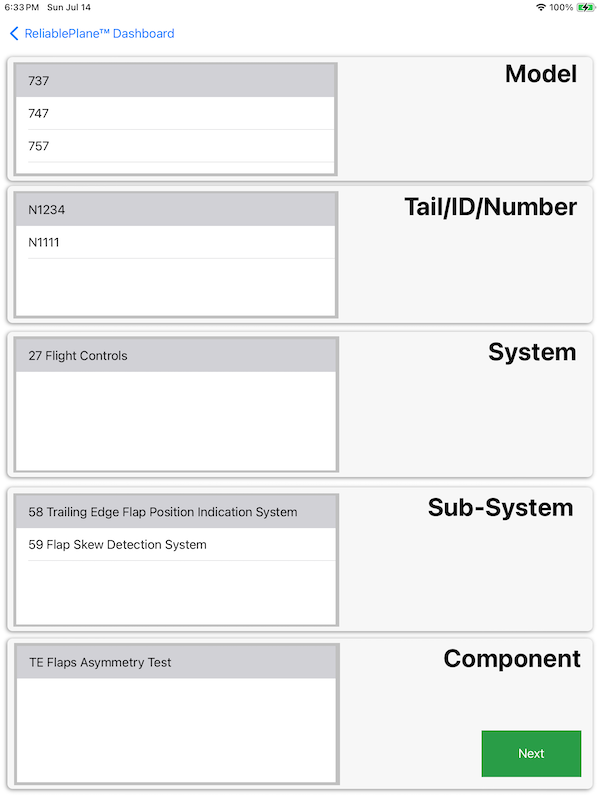
- Select the Aircraft Model / Aircraft Tail-ID / Aircraft System / Aircraft Sub-System / Aircraft Component from the tables and press the NEXT button. Tables will be filtered to display only the available TE Asymmetry Test System/Sub-System/Components.
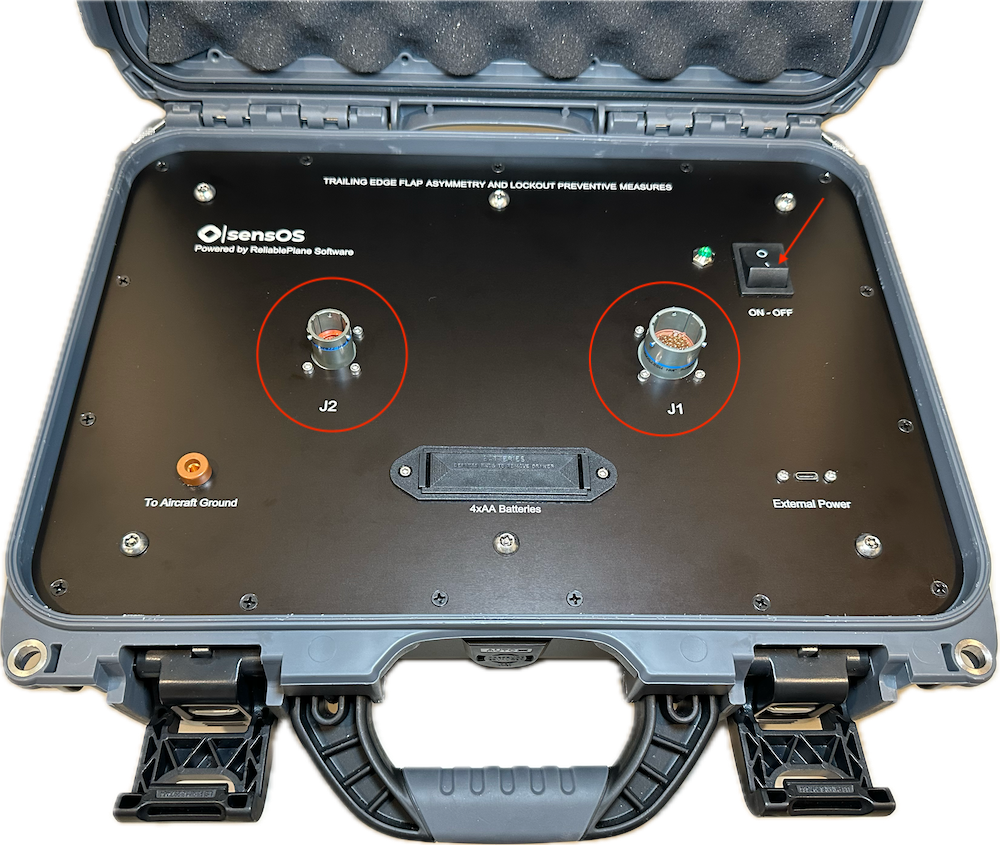
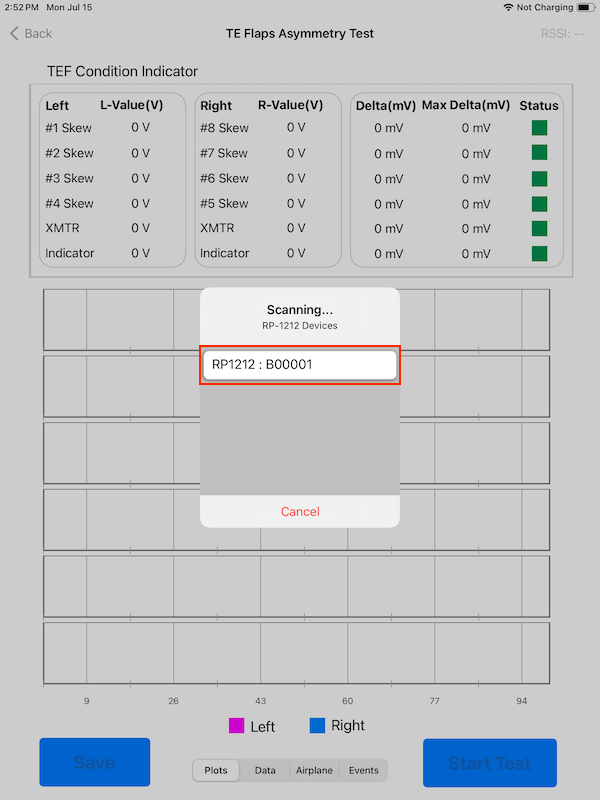
- Connect the aircraft input terminals (J1 to indicator in flight deck and J2 to FSEU in E&E bay) to the RP-1212 device and turn it ON. The device will advertise via bluetooth and will appear in the Scanning dialog in the App.
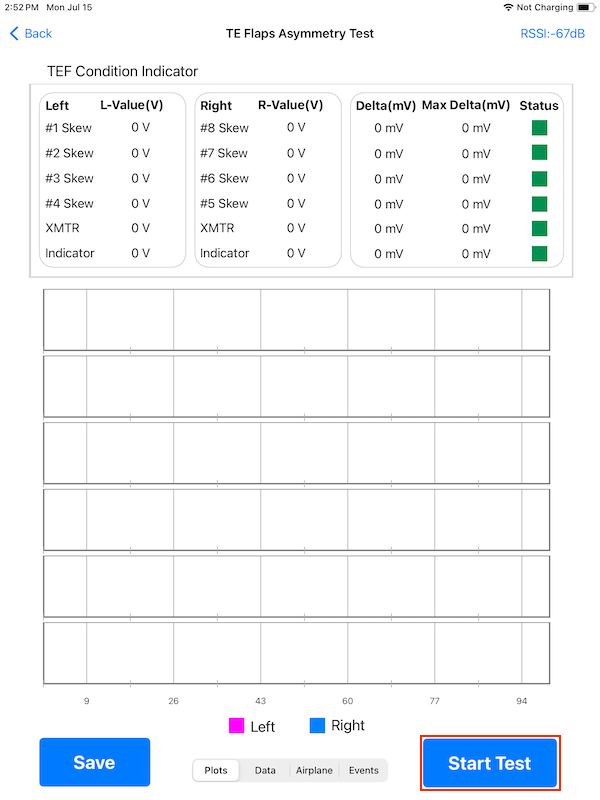
- Press on the BLE device to connect, the dialog will dissapear and the "Start Test" button will be enabled. The BLE signal RSSI will display on the top bar at the right.
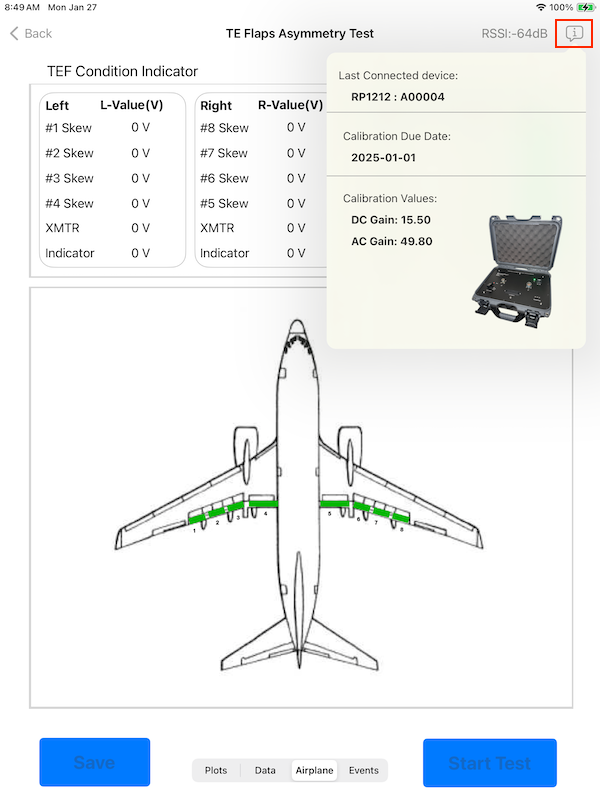
- Pressing the info button on the top right corner will display the last calibration data and calibration values of the device. This values are set for each device during the calibration process and stored in the ReliablePlane™ Cloud.
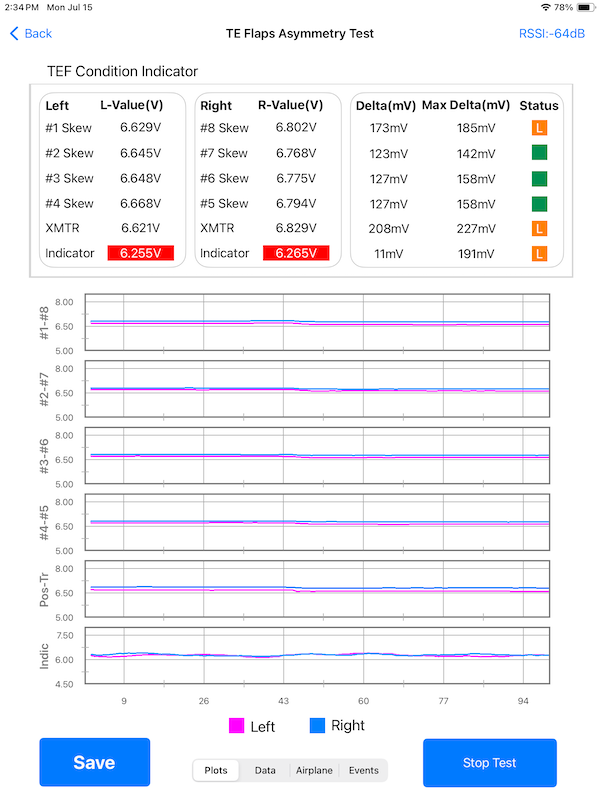
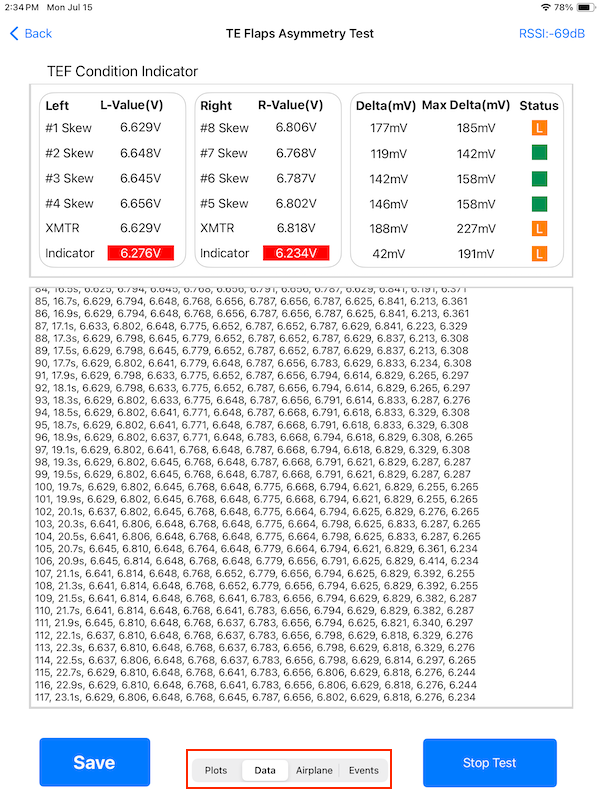
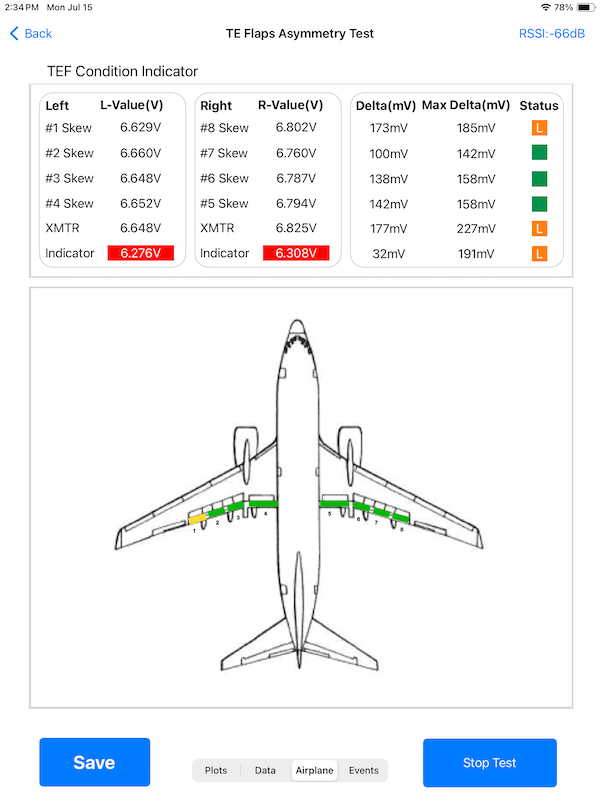
- Start moving the flaps and press the Start Test button, the system will start collecting the data and ploting the values for each pair, any variation in the values will be displayed in the plots. The Delta Values will be displayed for each pair and the Maximum Delta value will Hold. A Green status will show if the delta's are below the threshold, once a threshold is exceeded the Status will change to Red.
- Tap on the "Plots/Data/Airplane/Events" Selector to toggle between the real-time plots, raw data, Airplane graphic view or Warning Events
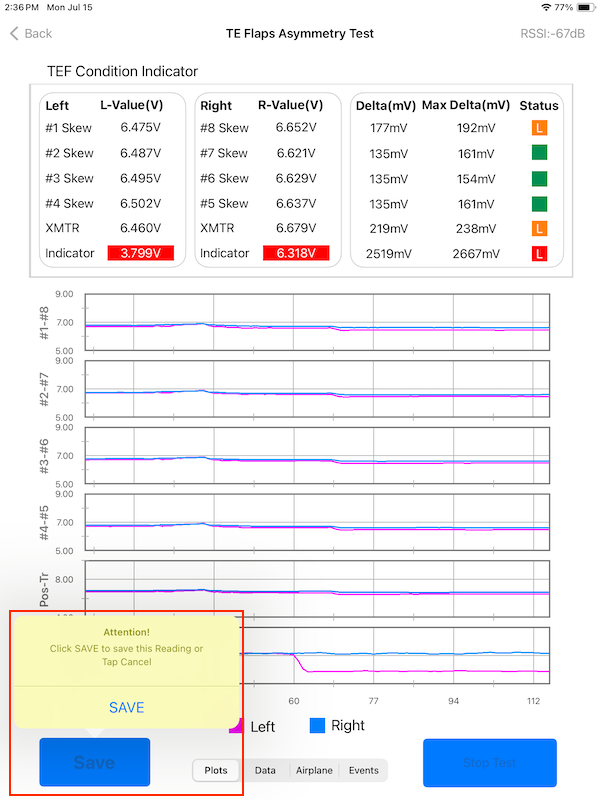
- Once the test ends, press the "Stop Test" Button" and save the data by pressing the "SAVE" button". A bubble indicating the number of saved readings for this component will appear. the user can repeat the test and save as many tests as needed.
Important: Flap Protection Switch (Normal/Override/Lock) will only work when using the Boeing v5 cables set.
Note: The data collection sampling rate can be changed, see: the Settings section
If delta values exceed the recommended thresholds the RP1212 will send a signal to stop the flap movement, this can be overrided by switching to "Override" in the box. Flaps can also be stoped manually by switching to "Lock".

Note: Press back to return to the previous page and select another component to test, or return to the main menu. The collected data can be sync to the Cloud, see: User/Accounts
Cloud Management
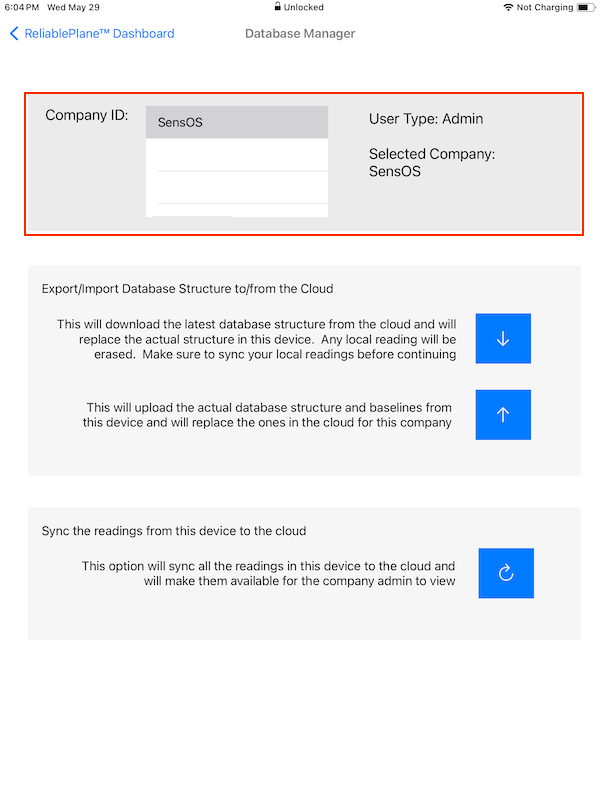
- In the Main Dashboard select Users / Accounts
- The List of available Companies will appear on the Table. Press one company (row) from the list to download or upload data to it. The Role of the user will also appear on this section.
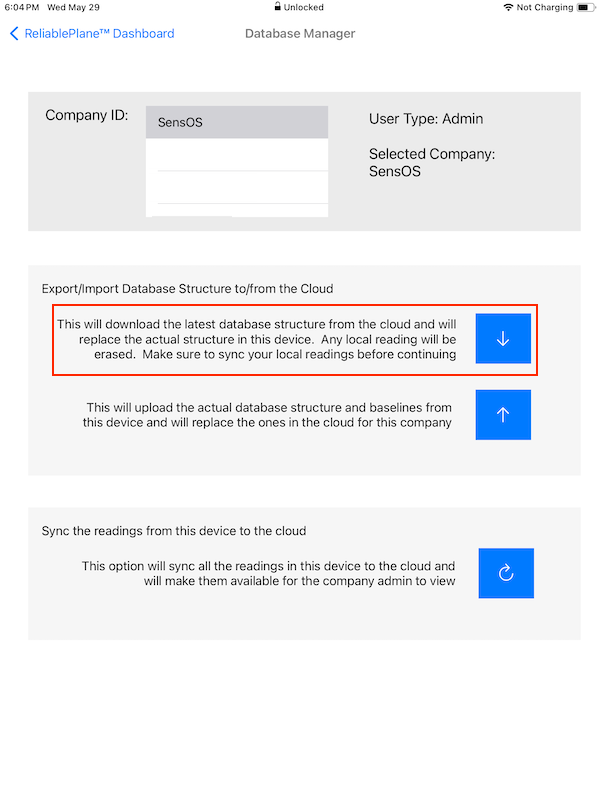
- To Download a Database/Baselines to the device, press the ⬇️ button and then press on the OK button, to Cancel press in any place outside the yellow pop-up. This will start downloading the whole database structure, baselines and instructions/pictures into the device. The process can take a few minutes depending on the size of the database, but this process will continue on the background, if the user decides to leave this page.
- To Upload the actual Database/Baselines in the device to the Cloud, press the ⬆️ button and then press on the OK button, to Cancel press in any place outside the yellow pop-up. This will start uploading the whole database structure, baselines and instructions/pictures to the Cloud The preocess can take a few minutes depending on the size of the database, but this process will continue on the background, if the user decides to leave this page.
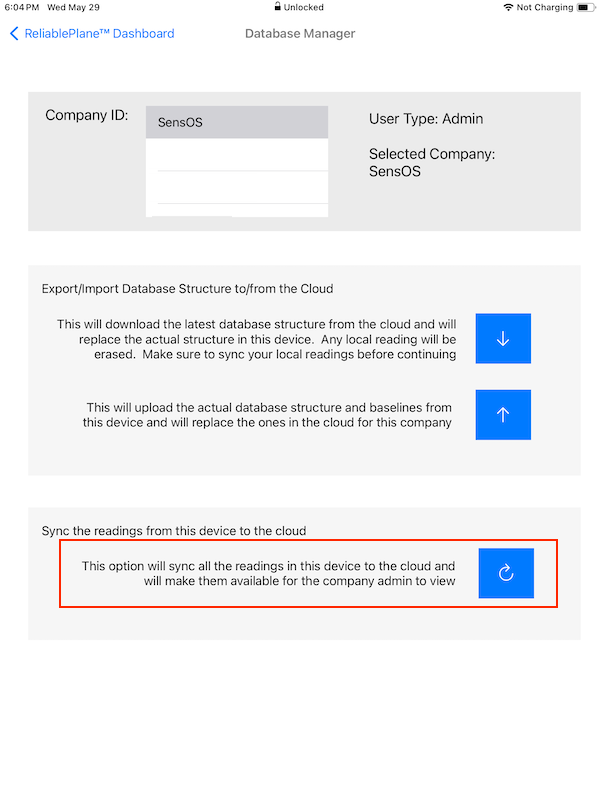
- To Sync collected data from the tests, press the 🔄 button and then press on the OK button, to Cancel press in any place outside the yellow pop-up. This will start the sync of all the collected data to the Cloud. If the user leaves the page the process will continue in the background. The collected data can be now viewed in the WebApp on any browser (https://app.reliableplane.com)
Note: The device will need Internet connectivity for this features.
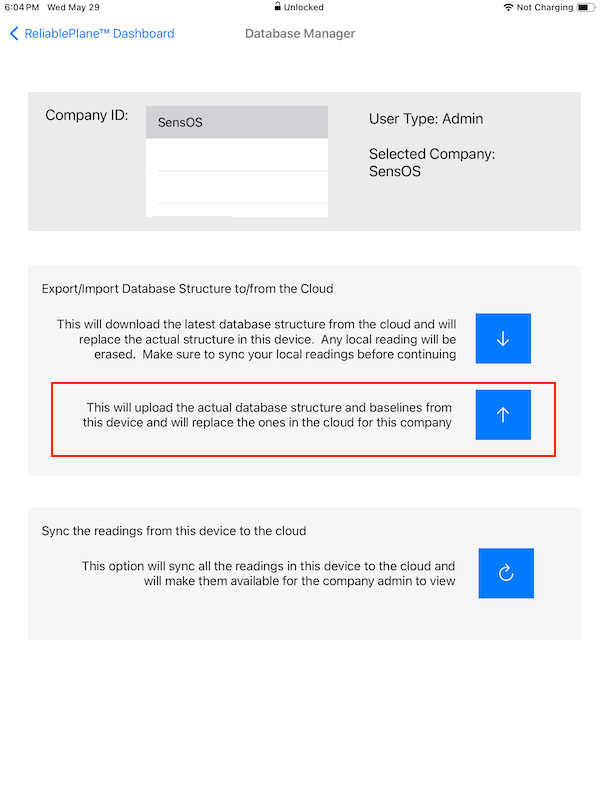
Note: The Upload button will be enabled only for the Admin user role.
Settings
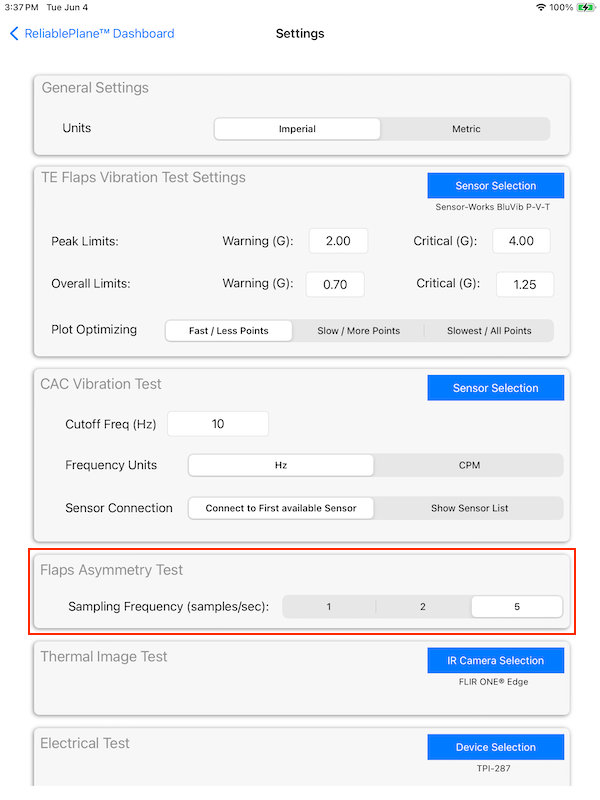
- In the Main Dashboard press the Settings button.
- Scroll to the "Flap Asymmetry Test" section. Here the admin user can see the gain values (values are set from the calibration via cloud), and view and change the thresholds. The user can change the number of samples to be sent per second, option are 1, 2 or 5 samples per second. Pressing the Default button will set all values to the original values.
Note: This option will be Enabled only for users with Admin Role.
View Data from Cloud/Local
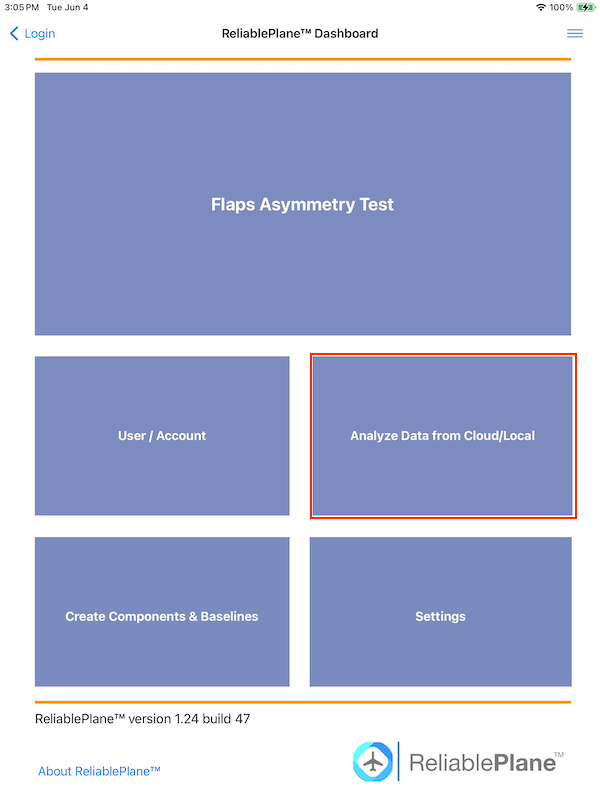
- To view data stored in the iPad or the data already uploded to the cloud (by any user in the same company) press the Analyze Data from Cloud/Local button in the Main Dashboard.
- Select the Aircraft Model / Tail / System / Component and the press Next
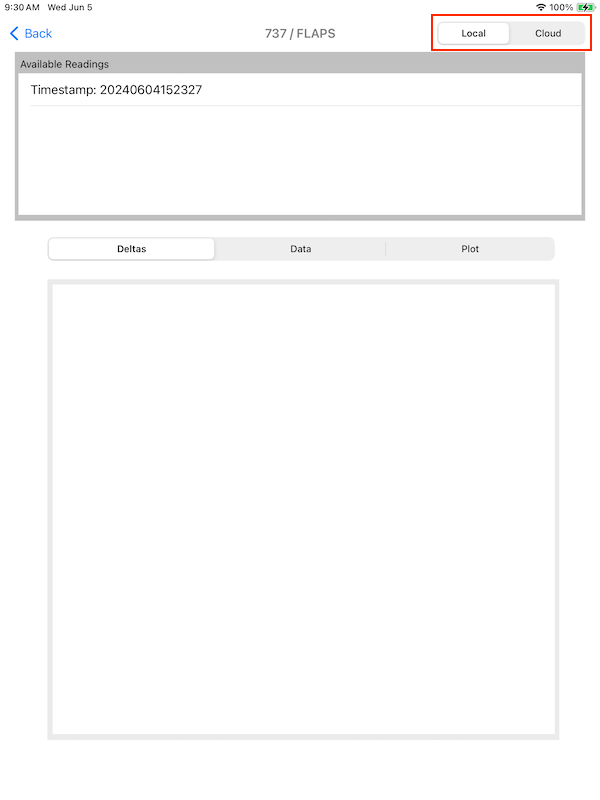
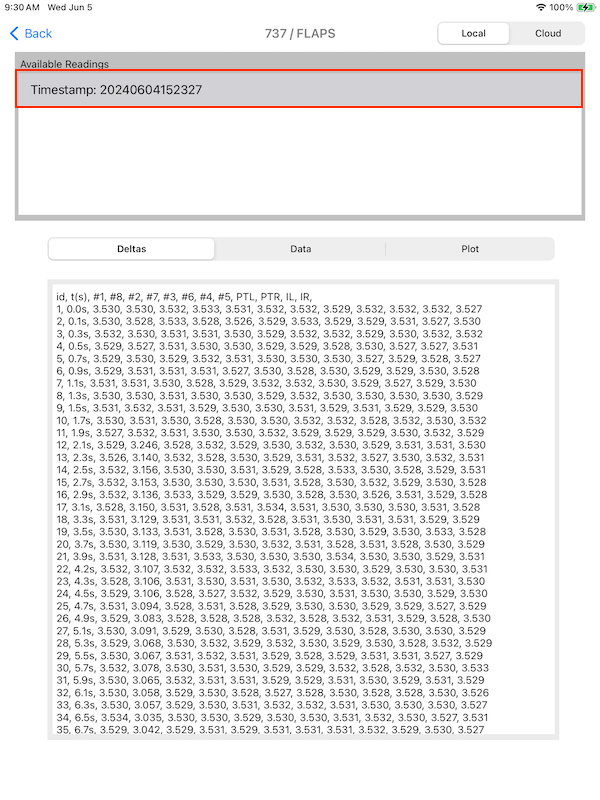
- To view the data saved locally, select the Local option. The list of all uploaded reading will be displayed (timestamps). Press on any reading from the list to display the collected raw data.
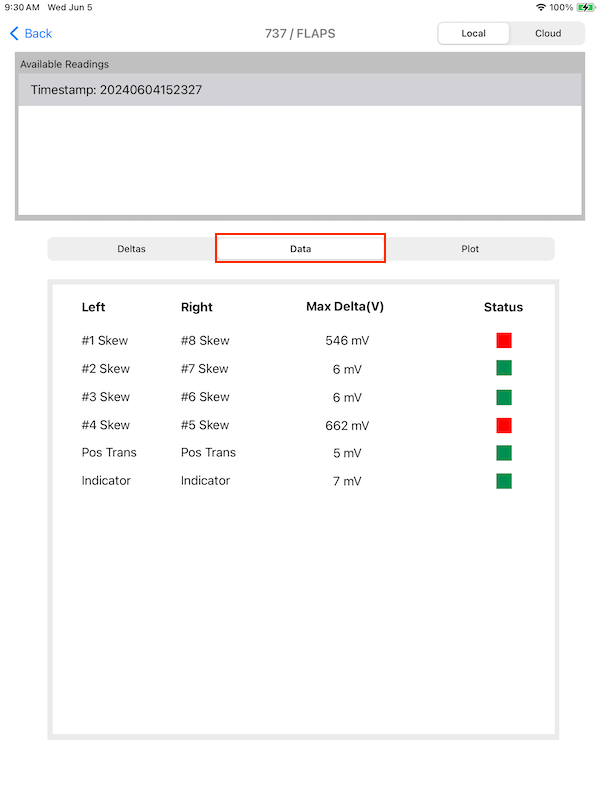
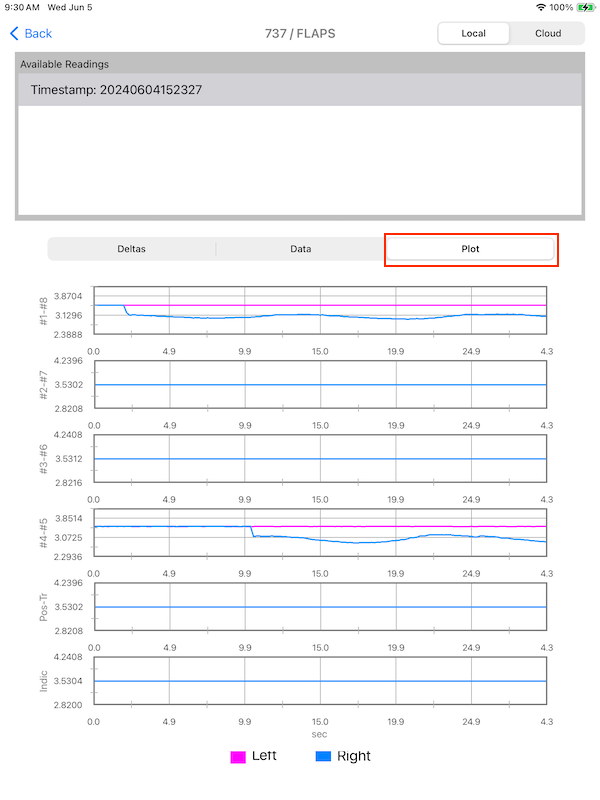
- Press the Delta to switch to the Max Delta values and Status dashboard. To see the Delta plots of the 6 pairs of value, press the Plot button.
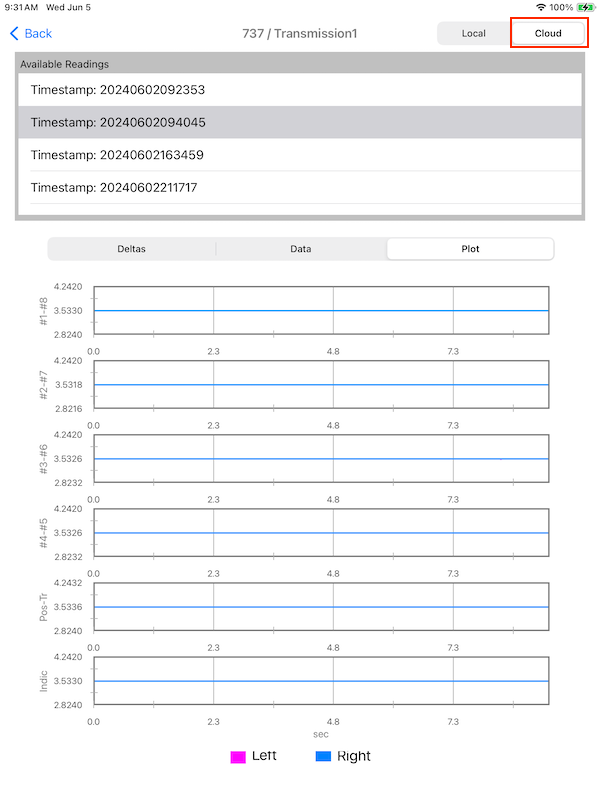
- To view data stored in the cloud, switch to Cloud the selector in the top bar. Select the test to view and switch between raw data, delta dashboard or plots.
Note: The device will need Internet connectivity for the cloud feature. Local readings will be available without internet connection.
Changelog
See what's new added, changed, fixed, improved or updated in the latest versions.
Version 2.20 b.77 (11 Nov, 2024)
- Added Flap Protection Switch
Version 2.02 b.52 (14 Jul, 2024)
- Added Sub-System Level
Version 1.25 b.48 (05 Jun, 2024)
- Added Scrolling Plots
Version 1.24 b.47 (05 May, 2024)
Initial Release