Documentation
Trailing Edge Flaps Vibration Test (4 Sensors)
ReliablePlane™: Trailing Edge Flaps Vibration Health Test
- Version: ReliablePlane™ 2.34 (b.97)
- Author: SensOS, LLC
- Created: 11 Jan, 2024
- Updated: 23 May, 2025
If you have any questions that are beyond the scope of this document, Please feel free to email via info@sens-os.com
Description
The Trailing Edge Flaps Vibration Test allows the Technician to select a specific Aircraft Model, Tail/ID, System, Sub-system and Component; and perform a full Vibration Test of 4 positions simultaneously. The software will also calculate the overall and max peak values and will display a message in case a fault is detected in the each transmission or ballnut.
Compatibility
This module is compatible with the following sensors:
- TPI-WA101
1-Channel / Wireless BLE Piezo-Sensor
Fmax: Up to 10,000 Hz
Spectral Lines of Resolution: Up to 25,600
Test Procedure
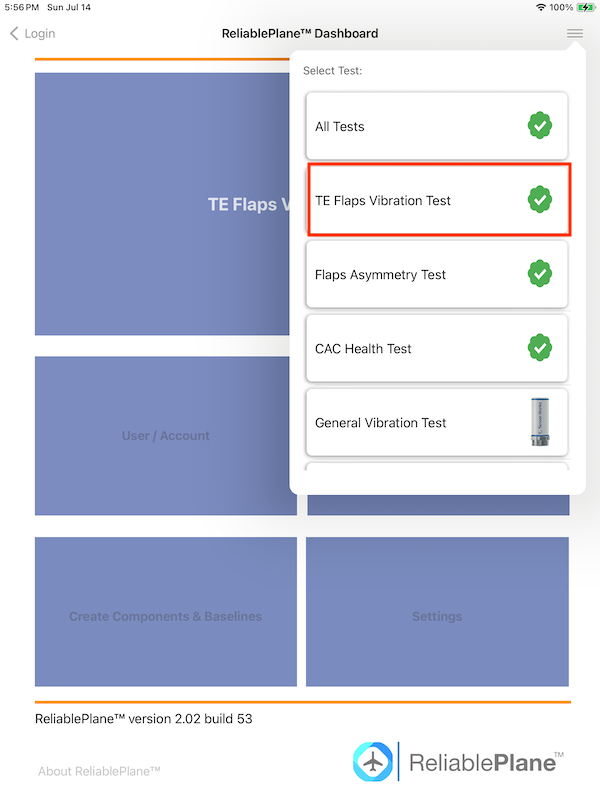
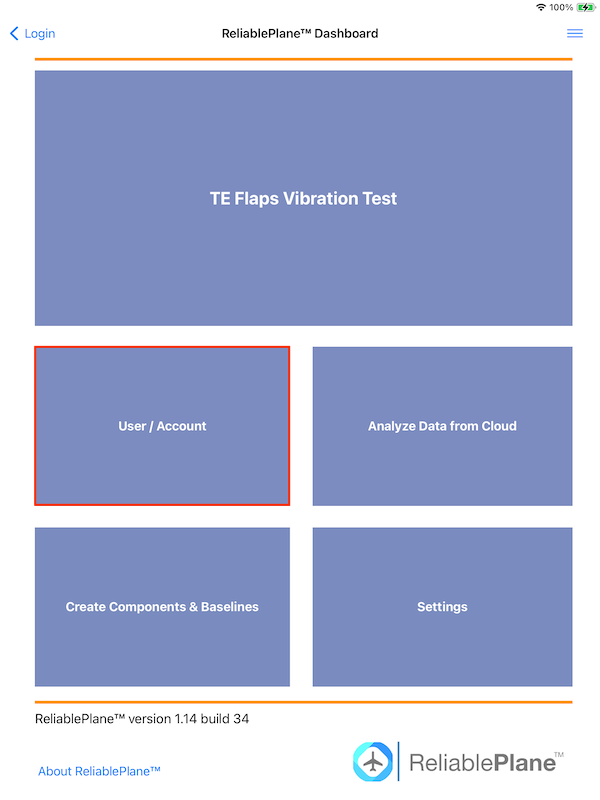
- Open the ReliablePlane™ App and select TE Flaps Vibration Test from the the type of test from the top menu button. Close the pop-up view by clicking on the background outside of the box.
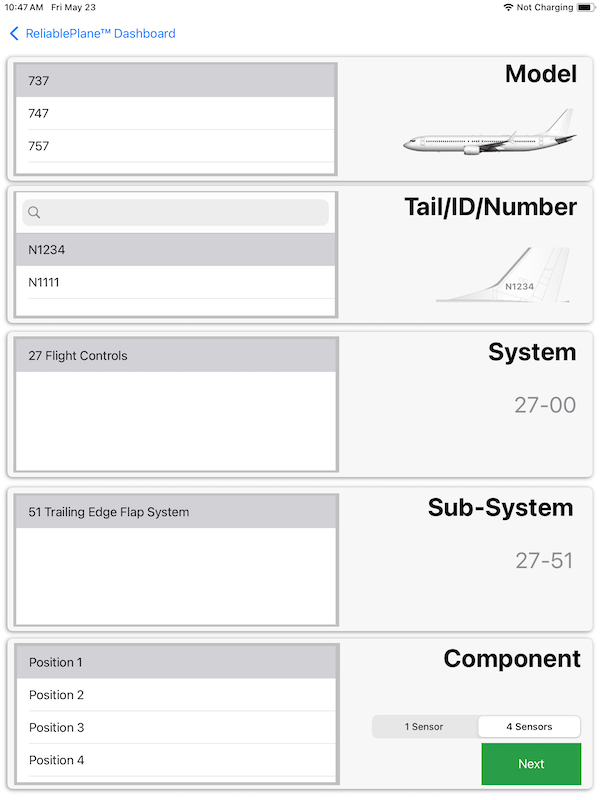
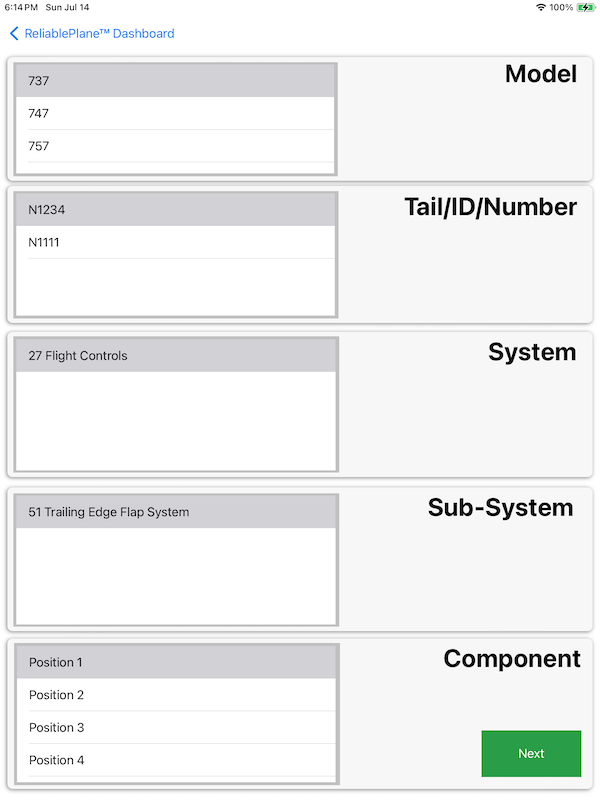
- Select the Aircraft Model / Aircraft Tail-ID / Aircraft System / Aitcraft Sub-System / Aircraft Component from the tables. Select the option to use "4 Sensors" form the selector and press the NEXT button. The fields will be filtered to show only the TE Flaps Vibration Test System/Sub-System/Components
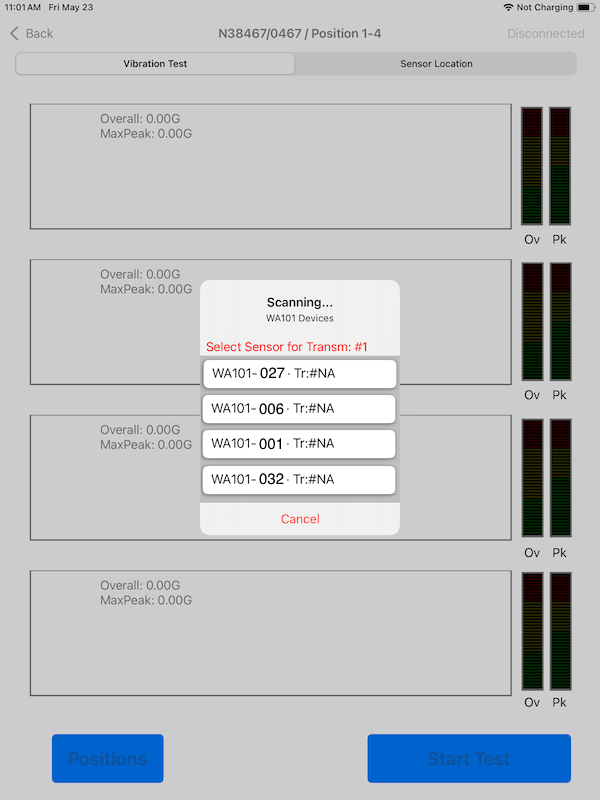
- Turn ON the 4 sensors, assign each sensor from the popup screen to a wing position.
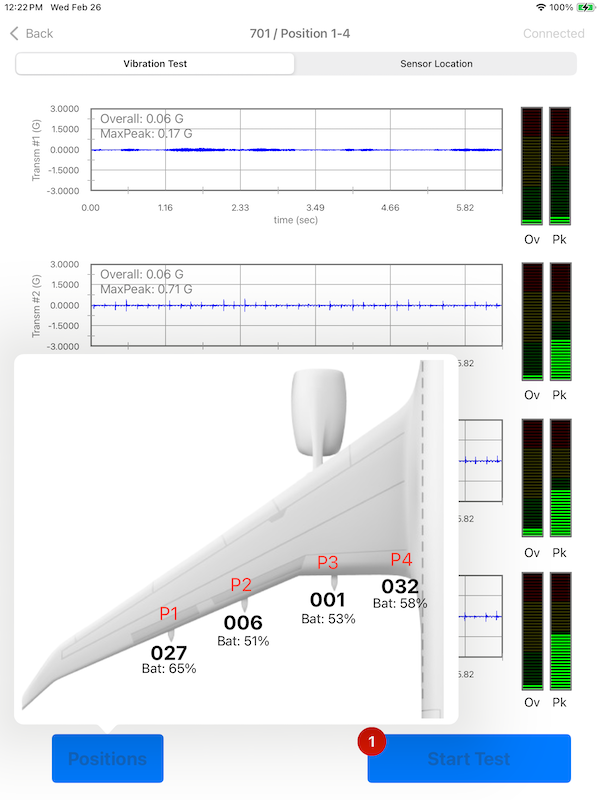
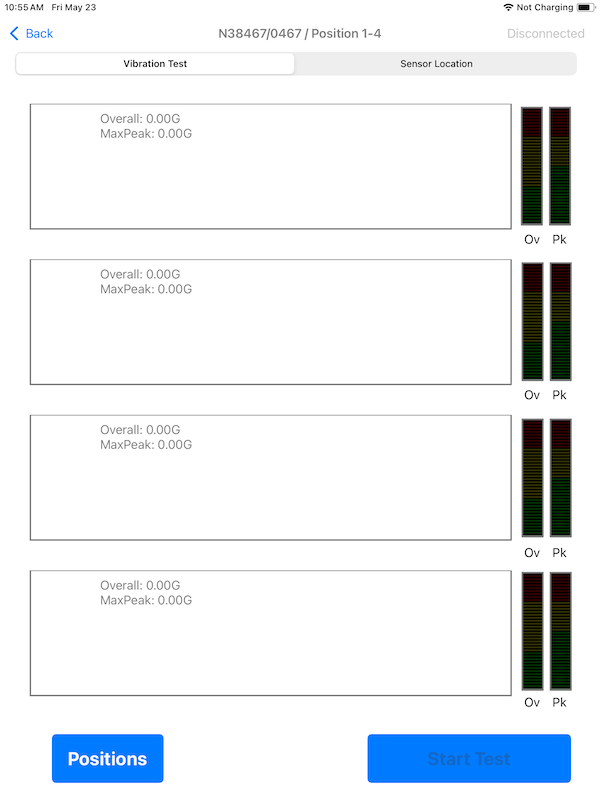
- Press the Position button to show the sensors assigned to each wing position. Battery levels for each sensor will also appear.
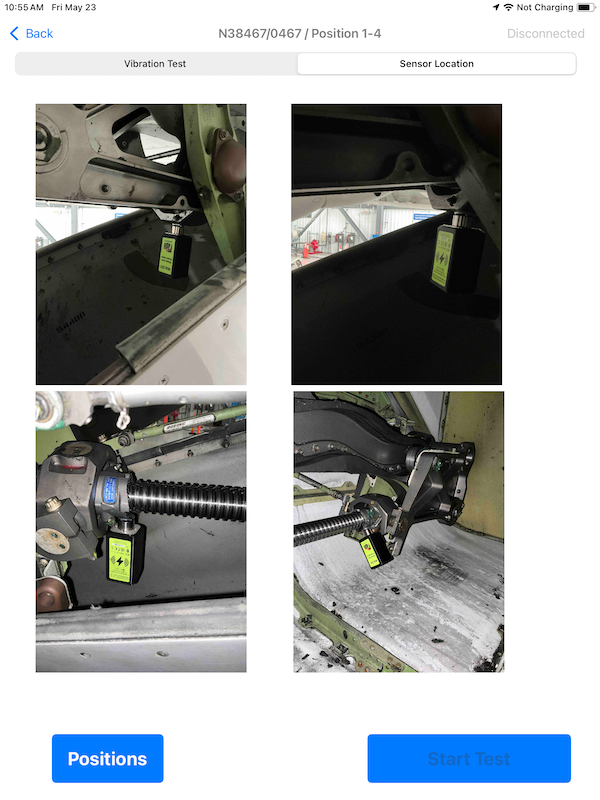
- Select the Sensor Location button on the selector in the top of the screen to show the correct position to mount the sensor.
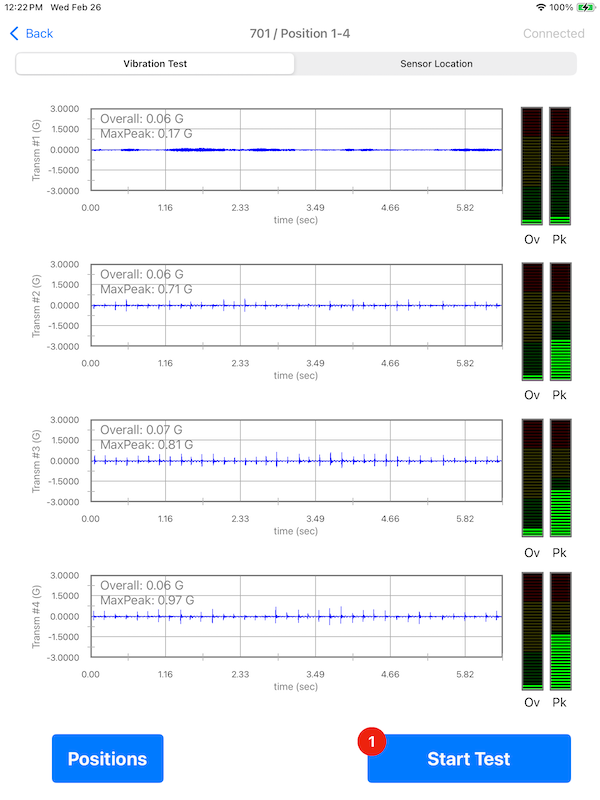
- Place the sensors on each transmission position and start moving the flaps, press the Start Test button to collect the vibration data. Data will be collected at the same time for the 4 sensors. After collecting the vibration the waveform will be displayed on each plot. If a fault is detected the software will show a pop-up with the detected problem.
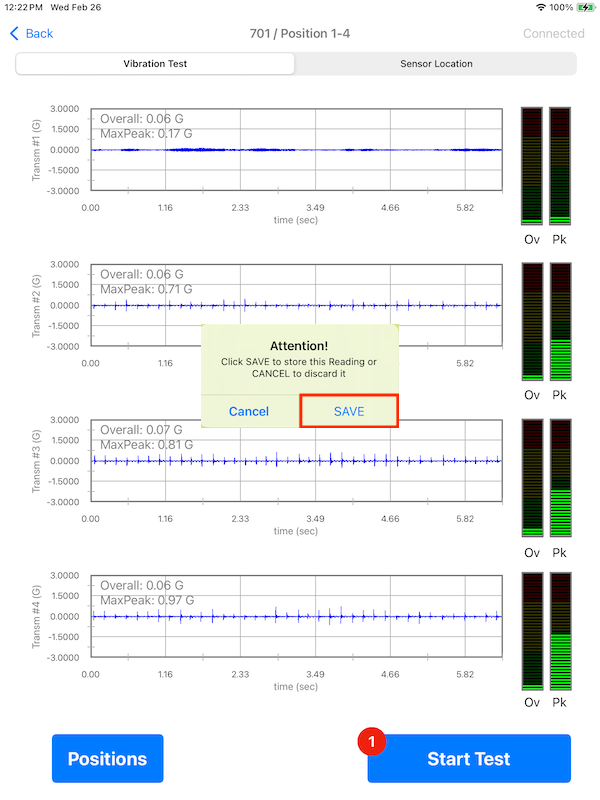
- A new pop-up will appear allowing to SAVE or CANCEL the reading. Once a reading is saved a bubble will appear besides the "Start Test" button indicating the number of readings taken for this component. The user can take as many readings as needed, once the data is sync'd to the cloud the reading count will be reset. see: User/Accounts to learn how to sync the readings to the cloud.
Cloud Management
- In the Main Dashboard select Users / Accounts
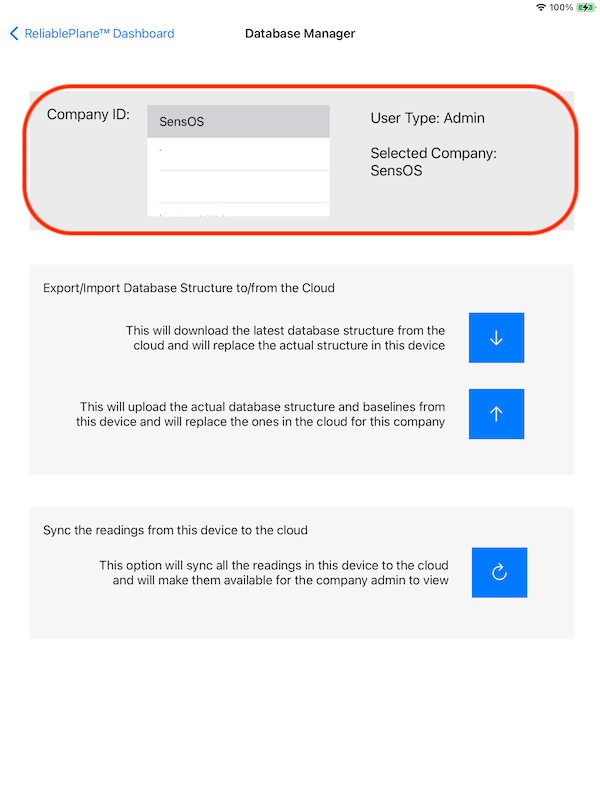
- The List of available Companies will appear on the Table. Press one company (row) from the list to download or upload data to it. The Role of the user will also appear on this section.
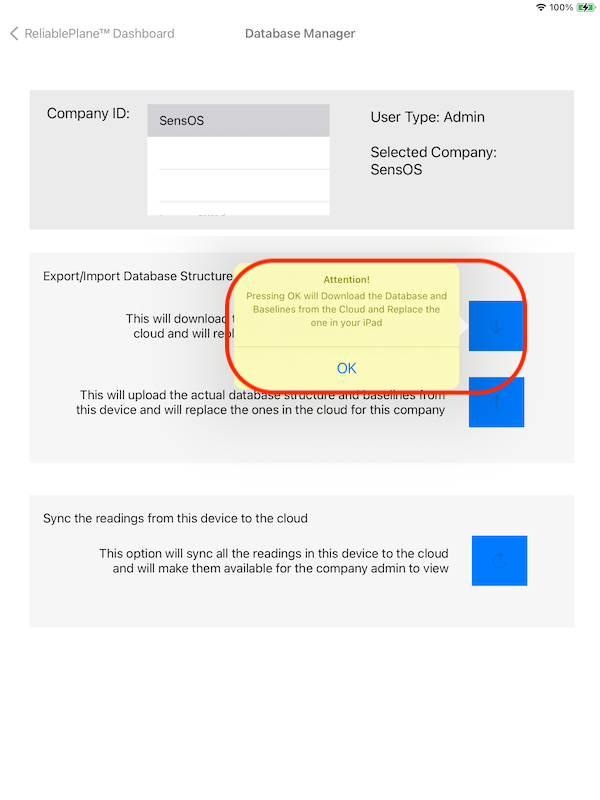
- To Download a Database/Baselines to the device, press the ⬇️ button and then press on the OK button, to Cancel press in any place outside the yellow pop-up. This will start downloading the whole database structure, baselines and instructions/pictures into the device. The process can take a few minutes depending on the size of the database, but this process will continue on the background, if the user decides to leave this page.
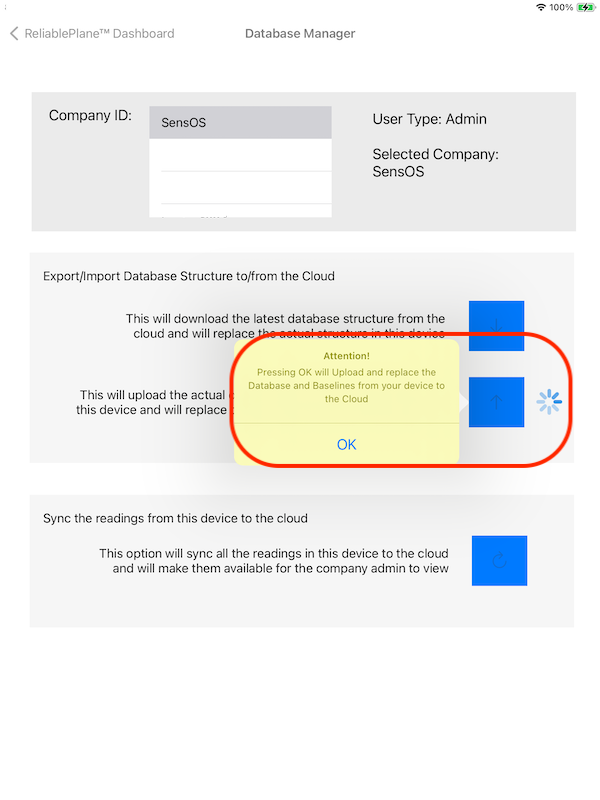
- To Upload the actual Database/Baselines in the device to the Cloud, press the ⬆️ button and then press on the OK button, to Cancel press in any place outside the yellow pop-up. This will start uploading the whole database structure, baselines and instructions/pictures to the Cloud The preocess can take a few minutes depending on the size of the database, but this process will continue on the background, if the user decides to leave this page.
- To Sync collected data from the tests, press the 🔄 button and then press on the OK button, to Cancel press in any place outside the yellow pop-up. This will start the sync of all the collected data to the Cloud. If the user leaves the page the process will continue in the background. The collected data can be now viewed in the WebApp on any browser (https://app.reliableplane.com)
Note: The device will need Internet connectivity for this features.
Note: The Upload button will be enabled only for the Admin user role.

Settings
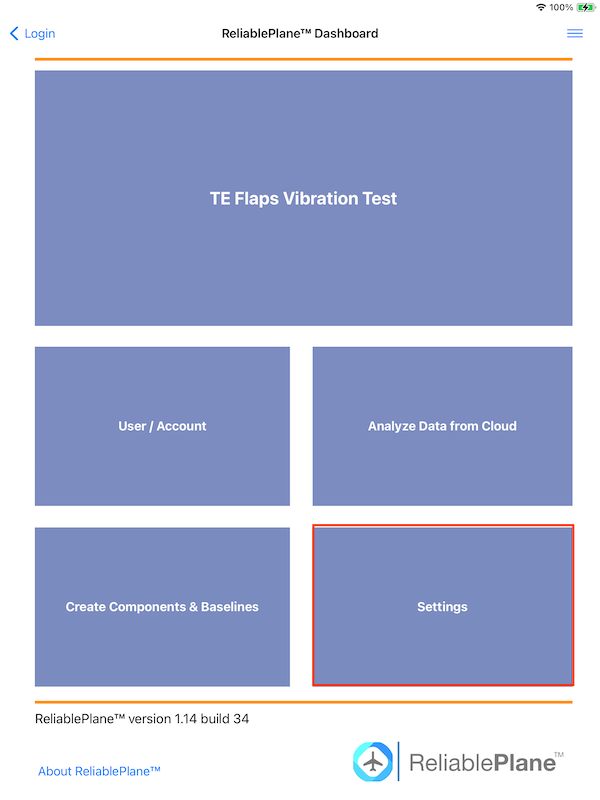
- In the Main Dashboard press the Settings button.
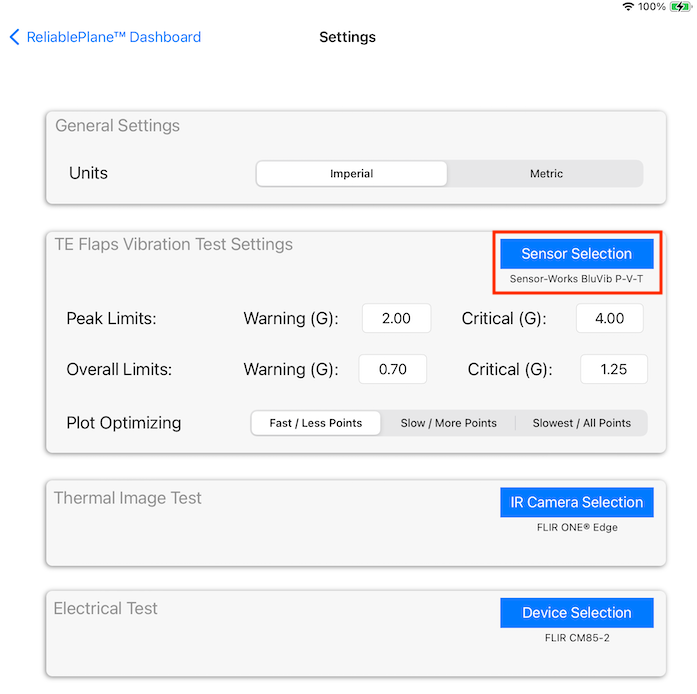
- The TE Flaps Vibration Test Settings will allow the user to switch the vibration sensors by pressing the Sensor Selection button. A pop up will appear and the user can select any available sensor. The selected sensor name will be displayed below the button.
- In the Settings view, the user can also change the default vibration thresholds and select the ploting resolution. (Selecting a plot will more points will make the ploting time increase in the baseline and test vibration waveforms.
Note: This option will be Enabled only for users with Admin Role.
View Data from Cloud/Local
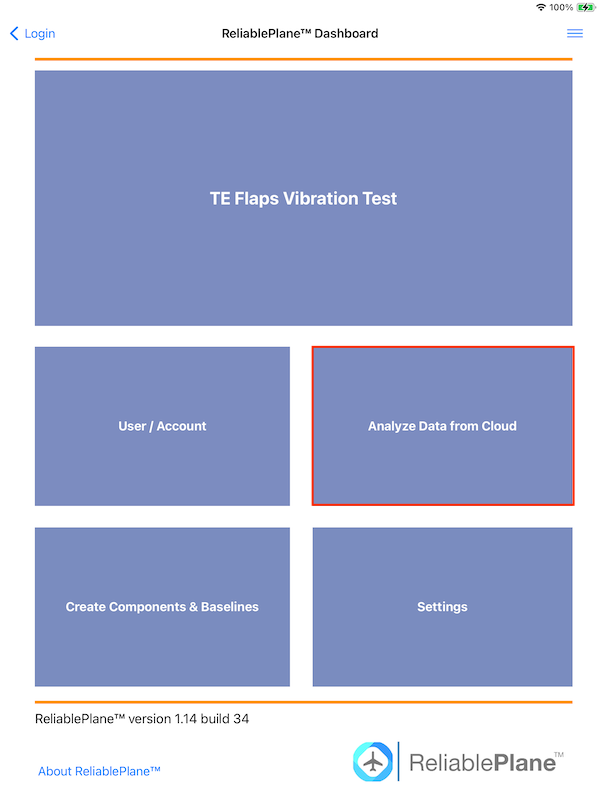
- To view data stored in the iPad or the data already uploded to the cloud (by any user in the same company) press the Analyze Data from Cloud/Local button in the Main Dashboard.
- Select the Aircraft Model / Tail / System / Sub-System / Component and the press Next
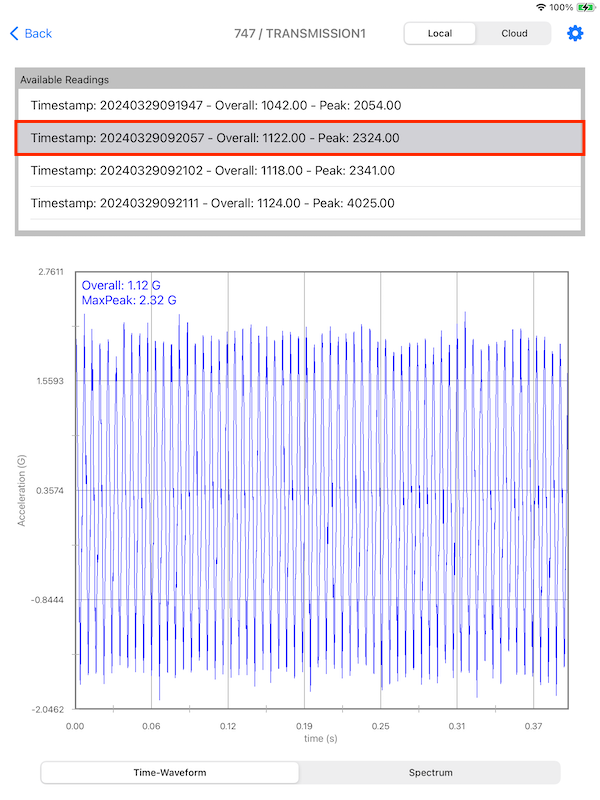
- If the data source selector is set to Local, the list of not yet uploaded readings will be displayed (timestamps). On the bottom the overall and peak values trends of those readings will be displayed. Press on any reading from the list to display the vibration time-waveform plot.
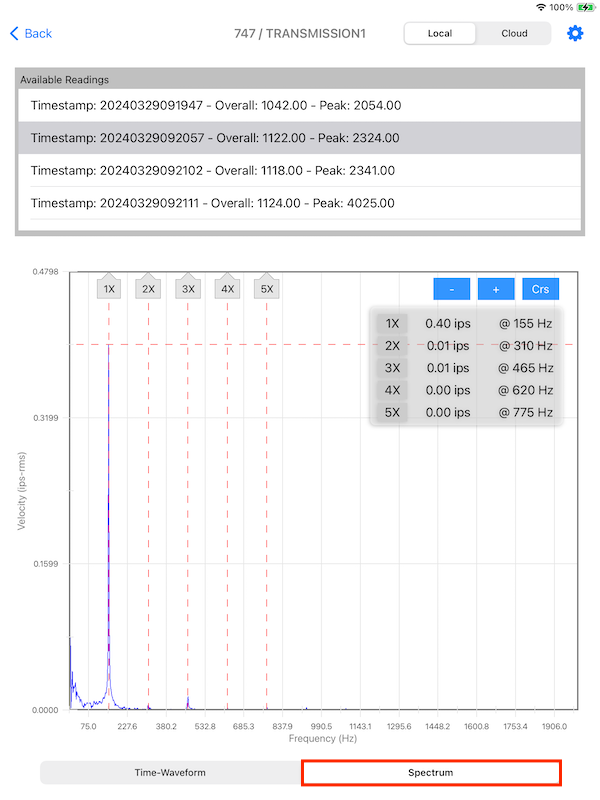
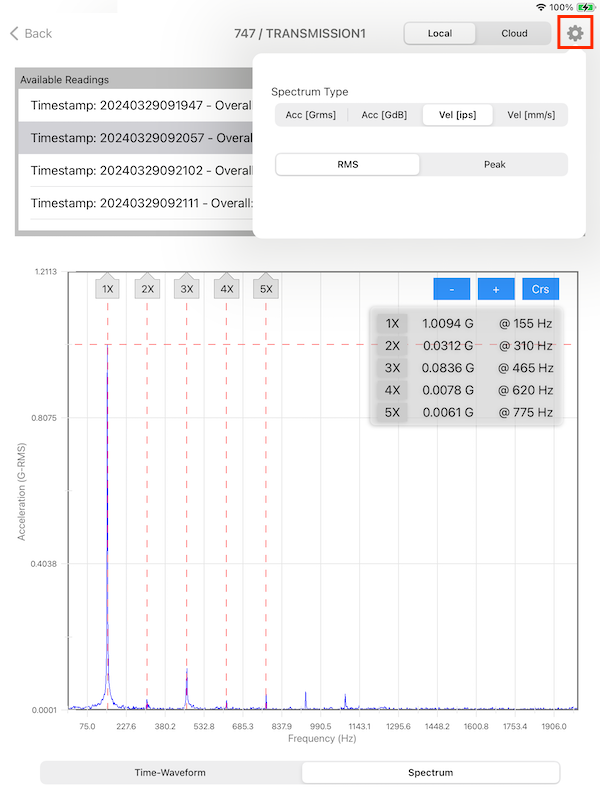
- To see the Spectrum plot of the selected reading, press the Spectrum button on the bottom of the screen. To display the cursors, press the "Crs" button; add or remove cursors with the "+" or "-" buttons. To switch between Acceleration/Velocity spectrum press the Configuration button on the top bar.
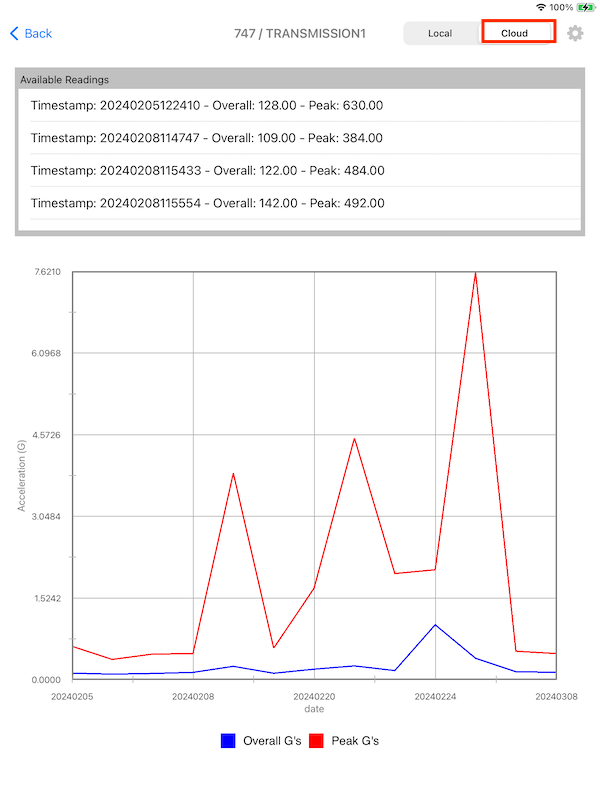
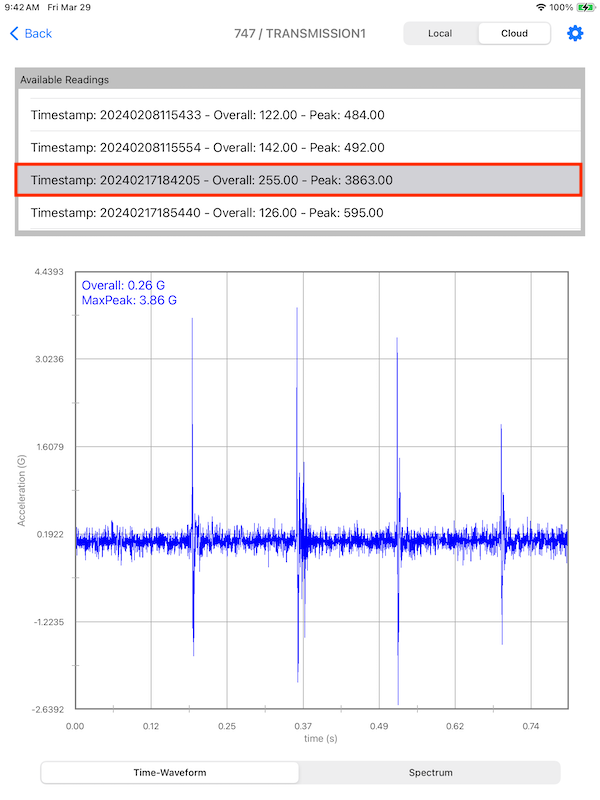
- To view the data already uploaded to the cloud, select the Cloud option. The list of all uploaded reading will be displayed (timestamps). On the bottom the overall and peak trends of those readings will be displayed. Press on any reading from the list to display the vibration time-waveform plot. Press the Spectrum to switch to the Spectrum Plot.1
Note: The device will need Internet connectivity for the cloud feature. Local readings will be available without internet connection.

Changelog
See what's new added, changed, fixed, improved or updated in the latest versions.
Version 2.03 b.54 (23 May, 2025)
- Added 4 sensor Simultaneous data readings
Version 2.02 b.53 (14 Jul, 2024)
- Added Sub-System Level to Hierarchy
Version 1.12 b.32 (11 Mar, 2024)
- Added Report Manager
Version 1.09 b.29 (08 Mar, 2024)
- Modified Reading Save/Cancel Popup
Version 1.07 b.27 (25 Feb, 2024)
- Added Sync Popup in Cloud Management
Version 1.01 b.01 (11 Jan, 2024)
Initial Release